How Can We Help?
Search for answers or browse our help center.
Stirrup stud installation
Install Stud in Cushion:
PARTS LIST:
Bolts, 5/16 -18 x 2 1/4″ (H5531) – 2 qty T-nuts (H1992) – 2 qty
Washers, 1/4″ ID (H283) – 2 qty
- Remove the staples securing the vinyl cover to the bottom of the cushion.
- The foam has been glued to the plywood. Carefully separate the foam from the plywood enough to access the T-nut that the cushion was originally mounted with.
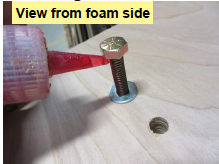
- Push the T-nut out of its hole and remove it. Insert the end of the enclosed bolt through a washer and into the same hole from the foamed surface.
- IMPORTANT – Add a generous amount of RED (permanent) thread locker, such as Loctite brand, to about a 3/4″ area of threads starting at the head of the bolt. “Generous” means not just a drop or two.
- Push the bolt through the wood until the washer is against the wood resulting in the rest of the bolt protruding from the bottom side of the cushion.
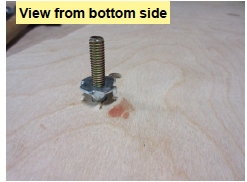
- Thread the T-nut on the bolt with the barbs pointed towards the wood and then spin it on until the barbs are at the surface of the wood but don’t score it.
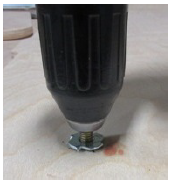
- Lock the chuck of a cordless drill onto the threads of the bolt and set the drill on its Reverse setting. Push the bolt and T-nut down so that the barbs of the T-nut sink into the wood. Power the drill to turn the bolt until the washer on the top surface begins to be drawn into the wood.
-
Staple the vinyl cover on the cushion.