Search for answers or browse our help center.
Replace the Lumbar Load Sensor
Replace the Lumbar Load Sensor
1. Remove the chest, pelvic, and leg cushions.
2. Locate the load sensor under the leg area and remove the two screws securing the load sensor to the frame. Use the same two screws to attach the new sensor.
3. The new load sensor has three connections.
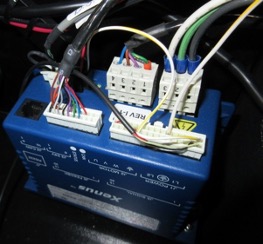
Squeeze the side of the long white connector and pull it straight out of the blue box. Use a very small screw driver or wire tie to remove the white and yellow wire from position #21 on the white connector. The photo shows the tip of a wire tie being used to depress the brass connector a little while gently pulling on the wire itself. Insert the wire into the same terminal of the new connector until the brass tab is visible in the slot again.
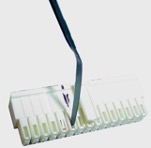
Gently depress the tab pull the wire out the top of the connector.
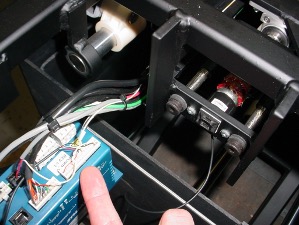
Squeeze the side of the black connector to remove it from the Xenus Drive and replace it with the new one that came with the load sensor.
The red and black wires are connected to the terminal block under the chest area. The photo shows the plastic panels that need to be removed to access the terminal block.