Search for answers or browse our help center.
Removing Cushions
Ha90C with Air Drops
– Rem oving Cushions –
FO O T – Remove the hex head bolts holding the cushion to the two hinges.
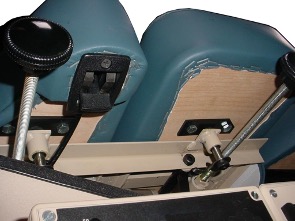
PELVIC – The tension knob w ill need to be unthreaded com pletely and rem oved.
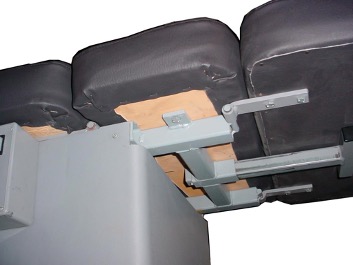
Remove the screw s that secure the outer section of the plastic enclosure to the top frame and let the section rest on the steel base. Rem ove the hex head bolts holding the pelvic cushion to the hinges. As you remove the cushion take note how the drop pin engages with the retainer bracket located on the bottom of the cushion. This will be helpful when putting the cushion back on.

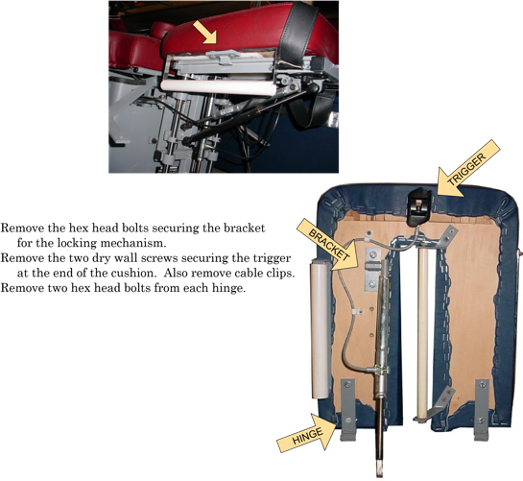
TH O RACIC & LU M BAR
Rem ove the screws securing the sm all plastic covers on each side. The tension knobs will need to be unthreaded completely and removed in order to free the cover on that side.

The cushion has a post on each side that is m ounted using a sm all plate. Remove the two hex head bolts that secure each sm all plate to the underside of the cushion. Remove the two dry wall screws that secure the trigger sat the edge of the cushion.
H EAD – Head cushions are secured in various w ays. Three of the more comm on are shown.
1. Dual Drop Assembly
Tw o dry wall screw s on each side are inserted through holes of the upper frame. The picture below shows the screw near the paper cutter.
2. Flex Head
Two bolts secure a retainer bracket on each side of the cushion. This side, with the paper roll, uses two hex head bolts. There are two flat heads under the paper cutter on the other side.