Search for answers or browse our help center.
Replace Motor
S.A.V.E.
Replace the Motor
Parts:
7 male connectors
7 female connectors
4 split connectors
2 ring connectors
12 in of 18ga green/yellow wire
30 inches of 18ga blue wire
8 wire ties
1. Unplug the Table
2. Remove the two sections of plastic enclosure from around the base area.
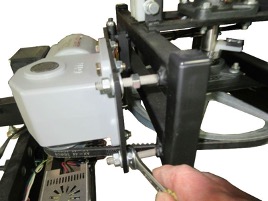
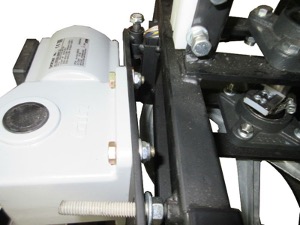
3. Loosen the tension on the belt. See photo below. Remove the belt.
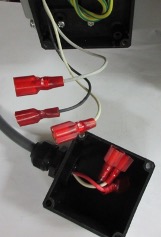
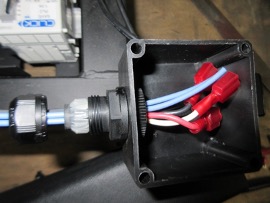
4. Open junction box on the motor and disconnect the wires.
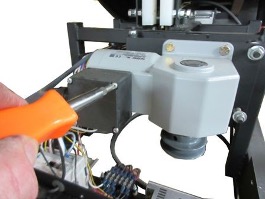
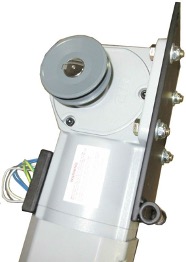
5. Remove the two bolts where the motor mount plate pivots on the base. Take note of the orientation of the motor on the plate before removing and then unbolt it. Bolt on the new motor to the mount plate nd use the original two shoulder bolts to secure at pivot point.
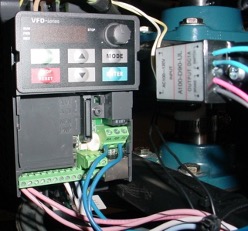
6. Mount the Rectifier close to the drive as shown so the two blue wires can reach the drive. Connect the blue wires form the rectifier to the drive where shown. The red and black wires from the rectifier need to be lengthened in order to connect to the blue wires of the motor. The white and yellow rectifier wires connect to the input terminals on top of the drive.
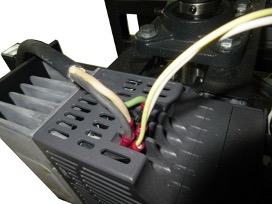
7. Loosen the cord restraint on the junction box and insert the two blue wires from the rectifier. Strip and crimp connectors to these wires as well as the blue on the new motor. Connect the wires in the junction box. Scrape paint and secure the ground wire to frame. Close up the junction box.
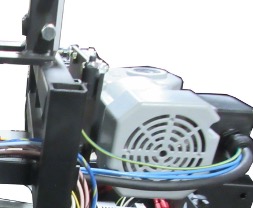
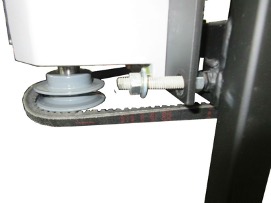
8. Verify that the pulleys are aligned with each other. If not, loosen the motor bolts and position the motor so the pulleys are parallel.
9. Locate the belt on the two pulleys and add tension by adjusting the nut.
10. Test for slippage and noise with weight on the table.
11. Reattach the enclosure.