How Can We Help?
Search for answers or browse our help center.
-
Table Base - General
- Actuator lubrication
- Actuator Mount Plate
- Add 1" of Height to a Stationary Base
- Add 5 1/2 Inches to Height
- Add 9 Inches to Height
- Add 9 Inches to Height of the Base
- Add a Push Button Switch to Cut Off Power
- Add a Tape Switch to Tape Switches
- Add Casters to a Base
- Add Corded Pedal to a Rocker
- Add Double Touch if No Board
- Add Hand Switch to Table
- Add Height to Table with a Rocker Pedal
- Add Height with Level Feet
- Add Length and Width Extensions
- Add Length Extensions
- Add Length Extensions to Level Feet
- Add Level Foot
- Add Spacer at Pivot Points
- Add Two Rocker Hand Switches
- Add Width Extensions
- Adding a Corded Pedal to a Table with One Corded Foot Pedal
- Adding a Rocker to an Extended Height Table
- Adding a Second Pressure Pedal
- Adding Bolt-on Width Extensions to a Base
- Adding Casters to Table with Leveling Feet
- Adding Length Extensions
- Adhere Velcro on Skirt to Prevent Rubbing
- Adjust "Limit Down" Micro Switch
- Auto Return - Replace the Switch
- Auto return board compared
- Auto Touch Foot Pedal Trouble Shooting
- Bolt on Foot Pad
- Caster Assembly
- Circuit board wire color template
- CM129 4-motor board diagram
- CM132 4-motor board diagram
- CM132 and Bostek switch compared
- CM132 PC Board Relay Identification Image
- CONVERT CM132 board to 230V
- Flat Cover Panel, with Luxo holes
- How to Add Tape Switches
- How to lubricate scissor pins
- How to move foot section wires on board
- How to move height section wires on board
- How to move lift back section wires on board
- How to replace a circuit board (for boards CM129 and CM132)
- How to temporarily bypass the circuit board
- How to use the Double-Touch Foot Pedal
- Install "Limit Down" Micro Switch
- Install a Micro Switch (For Tables With a Printed Board)
- Install Micro Switch(s) for tables with printed board
- Install Micro Switches
- Limit / micro switch locations
- Mechlock Release
- Move Hand Switch Receptacle to End of Base with the Board
- My table height will not go down when using the foot pedal
- Replace a Pedal Assembly
- Replace Actuator (After February 2004)
- Replace Actuator (February 2004 - Present)
- Replace Actuator and Actuator Adapter
- Replace B-1 Bushings
- Replace Brake Assembly or Worm Gear, noise in elevation motor
- Replace Capacitor
- Replace Circuit Board CM132 with CM129 for tables built between May 2011 to present
- Replace Circuit Board CM132 with CM129 for tables built between Oct 2010 and May 2011
- Replace Corded Pedal
- Replace Corded Wire
- Replace Corded Wire 2 (No Board)
- Replace Corded Wire 45 W/ Board
- Replace Corded Wire 79A
- Replace Power Cord
- Replace Switch in Hand Rocker
- Replace the AutoTouch Board
- Replace the Circuit Board
- Replacing a Corded Pedal
- Replacing a Rocker at Head End with a Corded Pedal
- Replacing a Rocker at Middle of base with a Corded Pedal
- Replacing a rocker foot pedal with corded
- Replacing the B-1 Bushings
- Replacing the Height Actuator in a Base For bases built after February 2004
- Replacing the Lower Scissor Pins
- Replacing the Motor Only
- Replacing the rocker foot pedal switch
- Replacing the Scissor Pins
- RFI Filter
- Rocker Foot Pedal - Align
- Rocker foot pedal alignment
- Shorten the Base
- Squeal noise at the top of height
- Switches Inside
- Threaded Insert, Level Feet
- Troubleshooting auto touch
- Troubleshooting swivel lock
- Wire 2 One Motor, Single Pedal
- Wire diagram for board & pedal assembly for 2, 3 4 motor tables
- Show all articles (81) Collapse Articles
Print
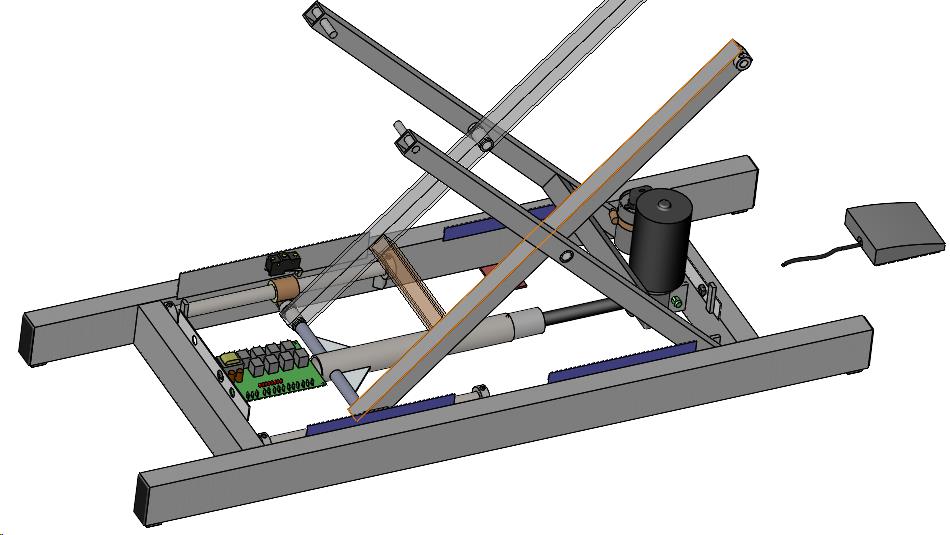
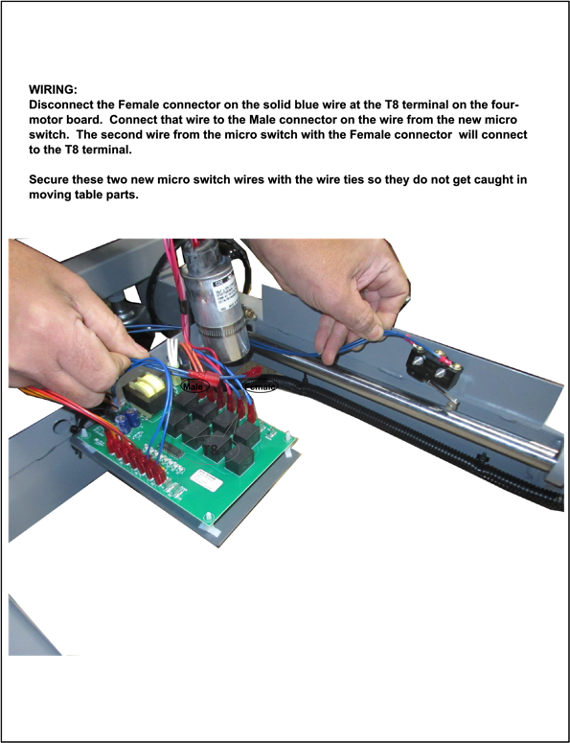
Install a Micro Switch (For Tables With a Printed Board)
Install Micro Switch, Limit Up
Parts Needed: KITBASE-023
MICRO SWITCH MOUNTING :
- Use the pedal to raise or lower the table to the height w here the two sections of skirt overlap.
- Remove the six screws that secure the lower section of skirt to the base.
- Unplug the table.
- Position the micro switch to cut off the motor just before it would reach the current position. Position it so that the plastic bushing will lift the lever with wheel on it. This location is with the roller on the microswitch being at about 4 1/2″ from the end of the metal strip.
- When you have determined the location, clamp the microswitch to the 2″ wide strip of the base and drill two 1/8″ mount holes in the metal strip.
- Mark the two screw locations, remove the micro switch, and drill the holes to 5/32″.
Attach the micro with the enclosed screws and nuts.